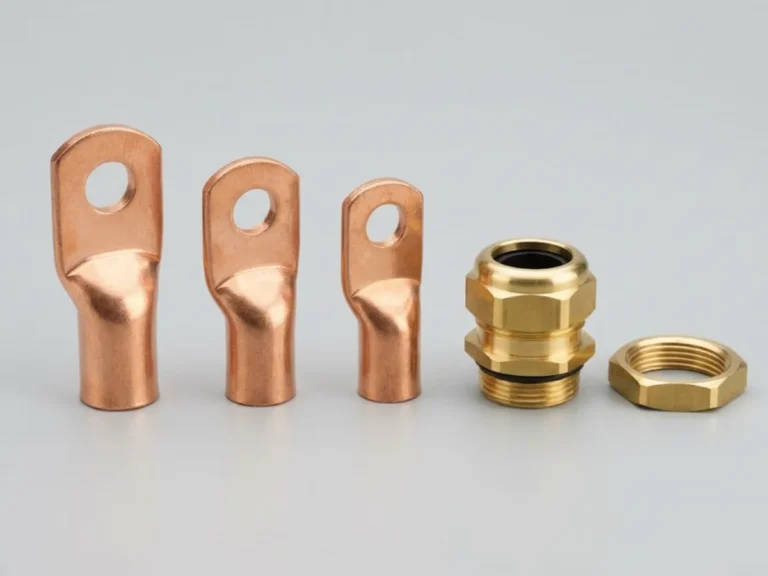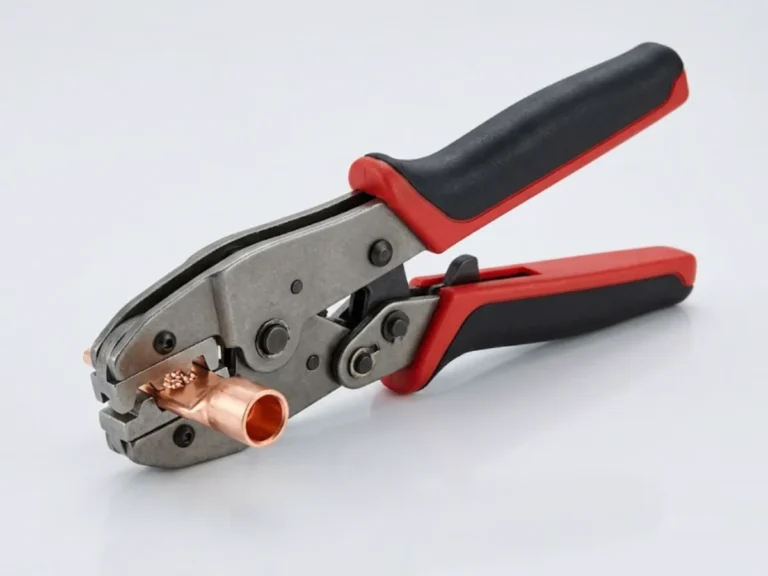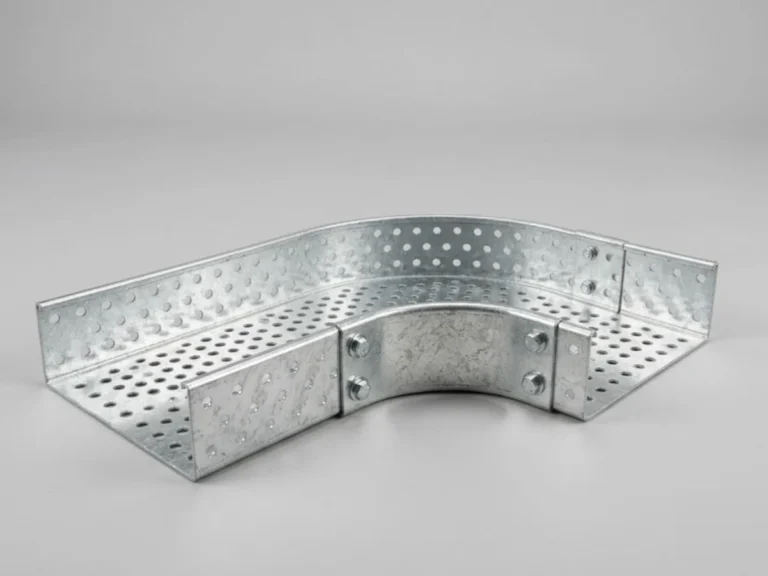
Most cable failures start at the ends, not in the middle. A poorly crimped lug overheats, a gland that does not grip the armour leaves the earth path open, and a tray that is overloaded or badly supported strains the cable. This guide covers how to choose lugs, glands and trays, and how to route cable so the installation stays reliable.
Cable lugs: match conductor, size and stud
A lug connects the cable conductor to a terminal. Three things must match.
- Conductor material: copper cable takes tinned copper lugs; aluminium cable takes aluminium lugs. Where an aluminium cable lands on a copper busbar or a copper terminal, use a bimetallic lug (aluminium barrel, copper palm) to avoid galvanic corrosion.
- Conductor size: the barrel must match the conductor cross-section in sq mm and the stranding. Never trim strands to fit.
- Hole size: the palm hole must suit the bolt or stud on the terminal, such as M8, M10 or M12. A bigger hole than the bolt cuts contact area.
Lug construction matters as well. Tubular lugs are the common choice for LT and HT cables; they should be crimped with a hexagonal die set matched to the lug size. Lugs with an inspection hole let you see that the conductor has reached the end of the barrel. Pin and ring types are used on control wiring. Use heat-shrink or insulating sleeves over the barrel where required, and make sure phase-to-phase and phase-to-earth clearances are maintained at the terminals. Browse the range under cable lugs and glands, and press them with matching crimping and termination tools.
Cable glands: seal and secure the entry
A gland holds the cable at the panel or equipment entry, seals the entry, and for armoured cable, connects the armour to earth. Match the gland to the cable and the location.
| Application | Gland type |
|---|---|
| Armoured cable, indoor | Double compression gland: grips the armour and the outer sheath separately |
| Armoured cable, outdoor or wet area | Double compression with weatherproof seal and, where specified, a shroud |
| Unarmoured cable | Single compression gland |
| Hazardous areas | Certified flameproof gland suited to the certified equipment and cable |
Choose the gland by the cable’s outer diameter and the armour type, not just by the cable size in sq mm. Entry thread size (metric or other) must fit the gland plate. Material options include brass (nickel-plated), stainless steel and polyamide for light duty. In corrosive or marine conditions, specify the material accordingly. For hazardous areas, the gland, the equipment and the cable must all be selected for that classification by a qualified engineer.
Good practice: cut the gland plate hole cleanly, fit the gland with its sealing washer or lock nut, and tighten the compression nut as the manufacturer states. After armouring, continuity from the armour through the gland to the panel earth should be measured.
Cable trays: choosing the type
Trays carry cable along a route with support, ventilation and organisation. The main types:
- Perforated trays: flat base with holes; good support for smaller cables, easy to cut and fit.
- Ladder trays: rungs between two side rails; the best ventilation and easy cable tie-down, preferred for heavy power cables and long spans.
- Trunking or covered trays: protect from dust, falling objects and sunlight, and give a cleaner appearance indoors.
Finish matters. Hot-dip galvanised trays suit outdoor and industrial use; pre-galvanised is fine for dry indoors; powder-coated or stainless are used in more demanding environments. Check the thickness and the load rating for the span you plan. See cable trays and accessories for bends, tees, reducers and supports.
Routing rules that prevent trouble
- Segregate by voltage and signal type: keep HT, LT power, control and instrumentation cables on separate trays or compartments, with spacing between power and signal circuits to limit interference.
- Do not overfill: leave room for heat dissipation and future additions. Single layer for large power cables is better for rating; grouping increases derating.
- Respect bending radius: bends smaller than the cable maker’s minimum damage insulation and armour. Larger cables need wide tray bends.
- Support at proper intervals: support spacing depends on tray type and cable weight; follow the tray manufacturer’s span and load table.
- Single-core cables: lay in trefoil or the specified arrangement and clamp with non-magnetic clamps to withstand fault forces.
- Earthing: bond tray sections together and to the earth system so the tray is continuous. See earthing materials.
- Fire barriers: use sealing at wall and floor penetrations as the site fire plan requires.
Selection checklist
- Confirm cable type, size and outer diameter.
- Pick lugs by conductor material, size and terminal stud.
- Pick the gland by cable construction (armoured or not) and area classification.
- Decide the tray type, width, finish and support layout.
- Check the crimping tool die range covers your lug sizes.
Do final cable and termination design with a qualified engineer. The cable accessories and earthing category lists the matching items together, and our power cables are the other half of the job.
Fitting and inspection
Before closing a panel, check that the gland plate is earthed, unused entries are blanked off, and cores are labelled at both ends. Tighten terminal bolts to the torque the terminal maker gives, using a calibrated spanner for large lugs, and re-check after the first few weeks of load because new joints can settle. Use a thermal scan during routine maintenance to spot any lug running hotter than its neighbours. Leave a small service loop so lugs can be re-made if the termination ever has to be redone.
What to send us for a quotation
Send cable type, size and outer diameter, conductor material, terminal bolt size, tray width, length and finish, and whether the area is outdoor or hazardous. A cable schedule saves time. Use request a quote or contact us, and we answer within 24 hours.
Frequently asked questions
Which lug should I use for aluminium cable?
Use an aluminium lug, or a bimetallic lug if the terminal is copper. Fitting a plain copper lug on aluminium conductor causes galvanic corrosion and a loose, hot joint over time. Use a compound or manufacturer-approved method where recommended, crimp with the correct die for the lug, and size the barrel to the conductor cross-section.
What is a double compression cable gland?
It is a gland with two seals: one grips the cable's outer sheath and a second clamps the armour wires or strip, which also provides the armour earth connection. It is used for armoured cables entering panels, junction boxes and equipment. Choose it by the cable's outer diameter and armour type. Unarmoured cable uses a simpler single compression gland.
Perforated tray or ladder tray: which is better?
Ladder trays offer more ventilation and are better for heavy power cables and long spans, while perforated trays suit smaller cables and shorter runs and give more continuous support. Covered or trunking types protect from dust and impact. Pick based on cable weight, ventilation, route length and environment, and check the tray's load rating for your span.
Do cables of different voltages share one tray?
Best practice is to keep HT, LT power, control and instrumentation cables on separate trays or compartments with spacing between them, because power cables can induce interference in signal circuits and a fault in one could damage others. Follow the project specification and the applicable code for the separation distances and barriers you need.